Introduction
There you are, keys in hand, ready to conquer the day. You turn the ignition, and instead of the powerful roar of your engine, you hear… click-click-click-click. Nothing. A dead car battery is like a plot twist nobody asked for in their morning. But don’t worry! This doesn’t have to ruin your day. Knowing how to jump start a car with cables is a superpower every driver should have. It’s a simple, time-saving skill that can get you back on the road in minutes, saving you money on a tow truck and a whole lot of frustration. Think of it as giving your car a little caffeine boost to start its morning. It’s easier than programming your TV remote and far more revolutionary for your daily life. So, take a deep breath. Let’s turn this stressful situation into a success story. Ready to become a jump-starting hero? Let’s dive in!
Table of Contents
What is Jump Starting a Car?
Imagine your car’s battery is like its personal energy drink. Over time, especially if you leave the lights on, that energy drink gets totally flat. The engine won’t turn over because it has no power. Jump starting is the simple process of using special cables to borrow a sip of a fresh “energy drink” from another car’s good battery. You connect the two batteries together, the good one shares its power with the dead one, and voilà – your car has enough juice to start up! It’s a quick and friendly rescue mission between two vehicles. Ever wonder if your car is smarter than your phone? Well, it can’t scroll social media, but it can definitely share power with a friend in need!
Why You’ll Love Knowing How to Jump Start a Car
This isn’t just a boring car maintenance task. This is about freedom and confidence. Here’s why mastering this skill is so awesome:
- You Save Time and Money: A tow truck can take over an hour to arrive and cost a pretty penny. A jump start takes 10 minutes and is absolutely free (if you have your own cables!).
- You Become a Hero: You can save your own day, your partner’s day, or even help a stranded stranger in a parking lot. Talk about good karma!
- It’s Easier Than You Think: Once you learn the simple steps, it’s a no-brainer. You’ll wonder why you ever felt nervous about it.
- Peace of Mind: Driving anywhere, anytime, feels less stressful when you know you have the power to handle a common problem right in your trunk.
It’s one of the most valuable and simple bits of car knowledge any driver, new or experienced, can have.
How to Use Jumper Cables: A Quick Overview
Using jumper cables is all about making the right connections between two car batteries. The entire process, from popping the hood to starting your engine, usually takes less than 10 minutes. It requires no technical skill, just the ability to tell red from black and to follow a safe order of operations. The key is to be calm, careful, and methodical. The ease of use is what makes it such an essential skill for first-time car buyers, seasoned drivers, and fleet managers alike.
Key Features of a Successful Jump Start
A successful jump start isn’t magic; it’s based on a few key principles:
- Safety First: The number one feature. Understanding how to avoid sparks and battery explosions is crucial.
- Proper Connection Order: There’s a specific sequence to connecting and disconnecting the cables that keeps you and the cars’ electrical systems safe.
- Good Cable Quality: Thick, sturdy cables with strong clamps transmit power much more effectively than thin, cheap ones.
- A Healthy Donor Battery: The “good Samaritan” car must have a battery with enough voltage (usually 12.6 volts) to share.
- Patience: After connecting, you often need to let the dead battery charge for a few minutes before it’s ready to start.
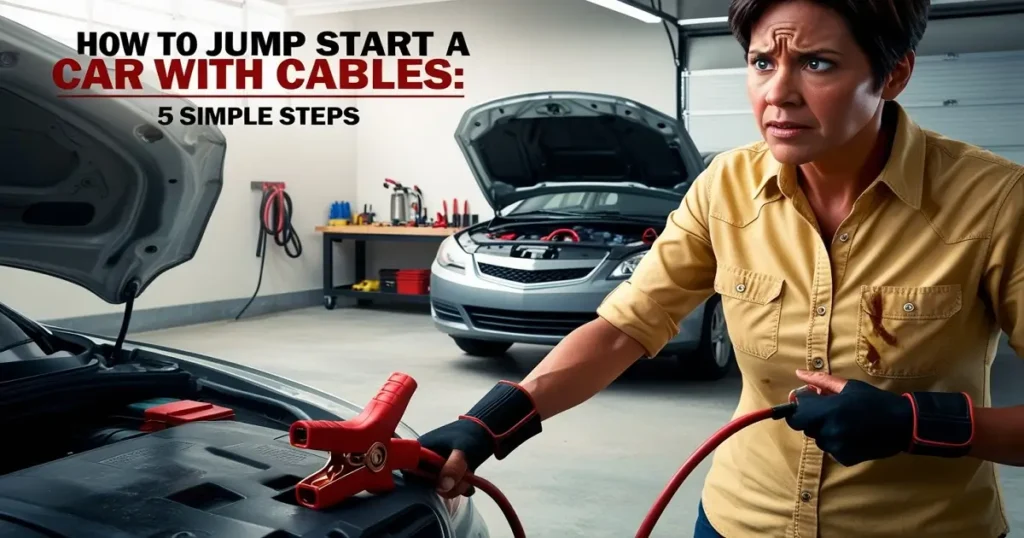
Your Step-by-Step Guide on How to Jump Start a Car with Cables

Follow these instructions carefully. Print this out and keep it in your glove box for easy reference!
What You’ll Need:
- A set of jumper cables (the thicker, the better).
- A vehicle with a good, working battery (the “donor” car).
- Safety glasses and gloves (recommended).
The Safety Dance – Before You Start:
- Check the Dead Battery: Look at the dead battery. If you see cracks, leaks, or the battery is frozen (the case might be bulging), DO NOT JUMP START IT. It could explode. Call a professional.
- Match the Voltages: Ensure both cars have a 12-volt battery. (Almost all modern cars do).
- Park Safely: Position the donor car so it’s facing your car, either nose-to-nose or side-by-side, but ensure the two cars do NOT touch. Put both cars in Park (or Neutral for manual) and engage the parking brakes.
- Turn Everything Off: In both cars, turn off the ignition, headlights, radio, heater, and all accessories. Unplug any phone chargers.
The RIGHT Way to Connect Jumper Cables
This is the most important part. Follow this order exactly to minimize the risk of a dangerous spark near the battery.
Step 1: Connect the RED Clamp to the DEAD Battery’s POSITIVE (+) Terminal.
Identify the positive terminal on the dead battery. It will have a “+” sign or a red cover. Attach one red (positive) clamp to it firmly, ensuring it has a solid metal-on-metal connection.
Step 2: Connect the OTHER RED Clamp to the GOOD Battery’s POSITIVE (+) Terminal.
Walk over to the donor car. Attach the other red (positive) clamp to the positive terminal of the good, live battery.
Step 3: Connect the BLACK Clamp to the GOOD Battery’s NEGATIVE (-) Terminal.
Now, attach one black (negative) clamp to the negative terminal of the good battery.
Step 4: Connect the FINAL BLACK Clamp to an UNPAINTED METAL SURFACE on the Dead Car’s Engine.
This is the safety step! DO NOT attach the final black clamp to the dead battery’s negative terminal. This could cause a spark right next to the battery, which is dangerous. Instead, find a solid, unpainted metal part of the dead car’s engine block, a bolt, or a metal bracket. This provides a safe ground.
The Moment of Truth: Starting the Cars
Step 5: Start the Donor Car.
Fire up the engine of the donor car. Let it run for a minute or two. You can gently press the gas pedal to rev the engine slightly, which will help the alternator generate more power.
Step 6: Try to Start the Dead Car.
Now, get into the car with the dead battery and try to start it. If the engine turns over slowly, wait another 2-3 minutes with the donor car running and try again. If it starts, fantastic! If it doesn’t crank at all, your battery might be too far gone, or you may have a connection issue.
Step 7: Disconnect the Cables in the REVERSE Order.
Once the dead car is running, it’s time to carefully remove the cables. Do this in the exact reverse order you put them on.
- Disconnect the black (negative) clamp from the ground on the newly started car.
- Disconnect the black (negative) clamp from the donor car’s battery.
- Disconnect the red (positive) clamp from the donor car’s battery.
- Disconnect the red (positive) clamp from the now-running car’s battery.
Step 8: Keep the Jump-Started Car Running.
Do not turn off your engine! Drive the car for at least 20-30 minutes to allow the alternator to fully recharge the battery.
What to Pair Your Jumper Cables With
While a classic set of cables is a trunk essential, modern technology offers some amazing alternatives and companions for this task.
- A Portable Jump Starter (Jump Box): This is the ultimate modern pairing. These are compact, powerful lithium-ion battery packs with built-in clamps. You don’t need another car! They are a game-changer for drivers who often travel alone or for fleet managers equipping their vehicles. Everyone should have one.
- A Battery Terminal Brush: Keep this handy to clean off corrosion from your battery terminals, which ensures a better connection and can prevent future dead batteries.
- A Multimeter: A simple tool that lets you check your battery’s voltage, so you know its health before it dies on you.
- A Good Pair of Gloves and Safety Glasses: Never underestimate the value of basic personal protective equipment.
Top Tips for Mastering the Jump Start
Becoming a pro means knowing these little hacks and common mistakes.
- Tip #1: Buy Good Cables. Don’t buy the cheapest, thinnest cables you can find. Invest in a quality set that is at least 10-12 feet long with thick, 4-gauge or 6-gauge wires. They will work faster and more reliably.
- Tip #2: Identify Terminals Before It’s Dark and Raining. Pop your hood on a sunny day and find your battery’s positive and negative terminals. Knowing where they are in advance removes stress in an already stressful situation.
- Tip #3: The 5-Minute Rule. If the car doesn’t start on the first try, let the donor car charge the battery for a full 5 minutes before trying again. Patience is key.
- Tip #4: Avoid the Negative Terminal on the Dead Battery. We said it before, but it’s worth repeating: always ground the final black clamp to an unpainted metal surface, NOT the dead battery’s negative post.
- Common Mistake: Crossing the Streams. Never, ever let the red and black clamps touch each other while either one is connected to a battery. This causes a direct short circuit and can be very dangerous.
- Common Mistake: Not Driving Afterward. If you turn the car off immediately after the jump, the battery will likely be dead again. You must drive it to recharge the battery.
How to Stay Updated with Car Battery Care
Car technology is always improving, and staying informed is the best way to be a responsible car owner.
- Subscribe to Automotive YouTube Channels: Channels like ChrisFix, Scotty Kilmer, and Engineering Explained offer fantastic, easy-to-understand videos on everything from jump starting to advanced diagnostics.
- Follow Car Tech Blogs: Websites like Jalopnik, Car and Driver, and Road & Track often have great advice sections and news on the latest tools, like new smart jump starters.
- Join Online Forums: Forums specific to your car’s make and model (e.g., Ford F150 Forum, Toyota Nation) are treasure troves of information where owners discuss common issues and solutions.
- Your Owner’s Manual: It’s not just a book for your glove box! It has specific instructions from the people who built your car. Give it a read.
Conclusion: You’ve Got the Power!
See? That wasn’t so scary. Learning how to jump start a car with cables is a simple, empowering skill that turns a panic-inducing moment into a minor inconvenience. You are now equipped with the knowledge to handle a dead battery safely and effectively. You can save your own day and be a hero for someone else. Remember, the keys are safety, the correct connection order, and a little bit of patience. So, go check your trunk. Do you have a good set of jumper cables? If not, maybe it’s time to make a quick trip to the auto parts store. Being prepared is the best feeling of all. Now, get out there and drive with confidence!
Ready to be 100% self-sufficient? [Check out our top-rated portable jump starters on Amazon here] and never rely on another car again!