Struggling with a weak car AC? Learn how to diagnose, repair, and prevent a car AC refrigerant leak. Expert guide to costs, DIY tips, and professional repair.
Introduction: Understanding Your Car’s AC Refrigerant Leak
That first hint of warm, muggy air blowing from your car’s vents is more than just an annoyance; it’s often the first sign of a failing air conditioning system. At the heart of this common automotive issue is a car AC refrigerant leak repair. The refrigerant, the lifeblood of your AC system, doesn’t get “used up.” If your AC is blowing warm air, it’s almost always because the pressurized refrigerant has escaped through a leak. Ignoring this problem doesn’t just lead to discomfort on a hot day—it can result in costly compressor failure and complete system breakdown.
This comprehensive guide is designed for car owners who want to understand the intricacies of their vehicle’s climate control system. We’ll demystify the process of car AC refrigerant leak repair, covering everything from early symptom recognition and professional diagnosis to the various repair options and their associated costs. Whether you’re considering a DIY approach for a minor issue or preparing for a visit to the shop for a major automotive AC repair, this article will equip you with the knowledge to make informed decisions and communicate effectively with technicians.
Table of Contents
How Your Car’s Air Conditioning System Works
To understand why a leak is so problematic, it helps to know the basics of how your car’s AC functions. It’s a closed-loop, pressurized system that operates on the principles of phase conversion—a refrigerant changing from liquid to gas and back again, absorbing and releasing heat in the process.
The five key components are:
- Compressor: The heart of the system, powered by the engine via a serpentine belt. It pressurizes the low-pressure refrigerant gas, turning it into a high-pressure, high-temperature gas.
- Condenser: Located in front of the radiator, this component acts like a tiny radiator itself. As the hot, pressurized gas flows through it, outside air cools it down, condensing it into a high-pressure liquid.
- Receiver-Drier or Accumulator: This component filters out moisture and debris from the refrigerant. Moisture is the enemy of an AC system, as it can form corrosive acids.
- Expansion Valve or Orifice Tube: This is the system’s metering device. It creates a precise pressure drop, causing the high-pressure liquid refrigerant to instantly expand and cool into a low-pressure, cold mist.
- Evaporator: Located inside your dashboard, this is where the magic happens. The cold, low-pressure refrigerant absorbs heat from the cabin air blown over its fins, cooling the air before it enters your car. The refrigerant then returns to the compressor as a low-pressure gas to start the cycle again.
A refrigerant leak disrupts this entire cycle. Low refrigerant levels mean lower pressure, preventing the phase change from happening efficiently. The compressor, designed to pump refrigerant, not air, will struggle and can overheat and self-destruct—a failure that often contaminates the entire system and leads to a very expensive repair bill.
Common Symptoms of an AC Refrigerant Leak
Don’t wait until your AC is blowing pure hot air. Watch for these early and late-stage signs of a car AC system leak:
Weak or Warm Airflow
The most obvious symptom. The air from the vents may start cool but quickly becomes lukewarm, especially at idle or in stop-and-go traffic. This indicates insufficient refrigerant to absorb adequate heat.
The AC Clutch Not Engaging
Look at the AC compressor under your hood (usually a cylindrical component with a pulley). The center clutch should click and spin when the AC is turned on. If it doesn’t engage, it’s often due to a low-pressure safety switch triggered by low refrigerant levels.
Unusual Hissing or Gurgling Sounds
A faint hissing from the dashboard or engine bay can indicate refrigerant escaping under pressure. Gurgling noises may suggest air and moisture have entered the system due to the leak.
Visible Oil Stains or Dye
Refrigerant oil circulates with the gas. A leak often leaves behind a telltale, greasy residue around hoses, fittings, the compressor, or the condenser. If a previous technician used a UV dye, a leak will glow brightly under a black light.
Foul Odors from Vents
Moisture that enters through a leak can pool in the evaporator case, leading to mold and mildew growth, which causes a musty smell when the AC is running.
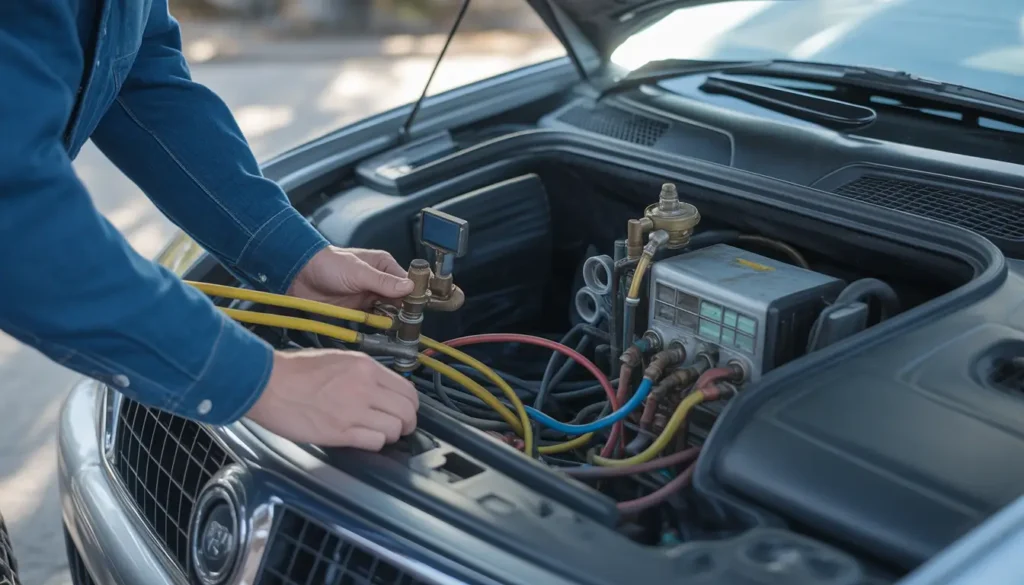
Diagnosing the Source of the Leak
Accurate diagnosis is 90% of a successful car AC refrigerant leak repair. Professionals use a multi-step process, and understanding it can help you evaluate your repair options.
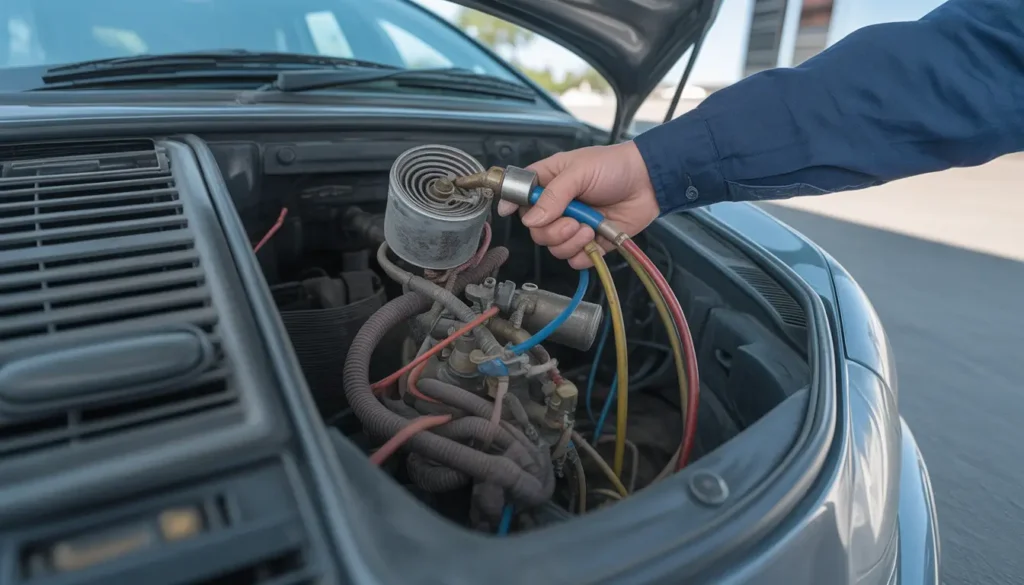
Visual Inspection
A technician will start with a thorough visual check for obvious signs: oil stains on components, damaged lines, corroded fittings, or physical damage to the condenser from road debris.
Electronic Leak Detector
This is the most common professional tool. A sensitive electronic sniffer probe is passed around all AC components and lines. It beeps or flashes when it detects refrigerant gas in the air, pinpointing the general area of the automotive AC leak.
UV Dye Injection and Inspection
A small amount of fluorescent dye is injected into the AC system. The system is run to circulate the dye, which will seep out at the leak point. Using a UV/black light, the exact source of the leak becomes visible as a bright, glowing spot. This is a highly effective method for finding small, elusive leaks.
Nitrogen Pressure Test
For stubborn leaks, especially after a major repair, the system may be pressurized with dry nitrogen. A significant pressure drop over time confirms a leak, and soapy water can be sprayed on fittings to reveal bubbles at the exact escape point.
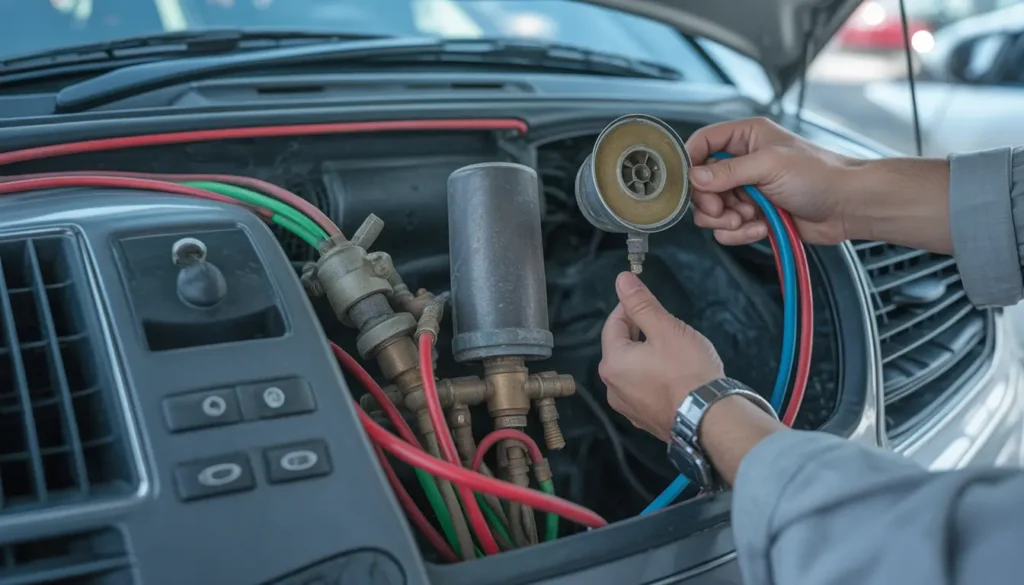
Common Leak Locations
- Condenser: Vulnerable to stone chips and corrosion.
- Schrader Valves (Service Ports): The valves where gauges are attached can wear out.
- Hoses and O-Ring Seals: Rubber hoses degrade over time, and the rubber O-rings at every connection can dry out, crack, and shrink.
- Evaporator Core: Located inside the dashboard, it can corrode. Replacing it is labor-intensive.
- Compressor Seals: The shaft seals on the compressor can fail, often indicated by oil around the compressor housing.
Professional Car AC Refrigerant Leak Repair Methods
Once the leak is located, the appropriate repair method can be chosen. The goal is not just to patch the leak, but to restore the system’s integrity and performance.
Replacing O-Rings and Seals
This is often the simplest and most cost-effective repair. The old, hardened O-ring is removed from a connection, the area is cleaned, and a new O-ring, lubricated with refrigerant oil, is installed. This fixes a significant percentage of leaks.
Repair or Replacement of AC Hoses and Lines
A leaking hose assembly must be replaced. In some cases, a dedicated hose repair shop can crimp a new fitting onto an existing line. Most often, a complete hose or line assembly is installed.
Condenser Replacement
A damaged condenser is rarely repairable. Replacement involves recovering the refrigerant, removing the old unit (often requiring removal of the front bumper or grille), installing a new one, and reconnecting the lines.
Evaporator Core Replacement
This is one of the most labor-intensive and costly repairs, as it typically requires the entire dashboard to be carefully dismantled to access the evaporator housing inside the firewall. The repair itself—swapping the core—is straightforward, but the labor hours are significant.
Compressor Seal or Clutch Repair/Replacement
If the compressor itself is leaking from its body or shaft seal, it often necessitates a full compressor replacement. A failing clutch can sometimes be replaced separately if the compressor internals are still sound.
The Critical “Recover, Evacuate, and Recharge” Process
A proper professional AC repair is never just about “adding a can of Freon.” The correct procedure is:
- Recovery: Using a dedicated machine, all remaining refrigerant is safely extracted from the system and stored.
- Repair: The identified leak is fixed.
- Evacuation: A vacuum pump is connected to the system for a minimum of 30-45 minutes. This removes all air and moisture, which is critical for performance and preventing internal corrosion. The system is then tested to hold a vacuum, confirming the leak is fixed.
- Recharge: The machine meters the precise amount of refrigerant (and oil, if needed) specified by the vehicle manufacturer back into the dry, empty system.
DIY vs. Professional Repair: What You Need to Know
The allure of DIY AC leak repair is strong, especially with “stop-leak” products and recharge kits sold at auto parts stores. Here’s a realistic breakdown.
The Risks of DIY and “Quick-Charge” Kits
- Misdiagnosis: You might be treating a symptom, not the cause. A low charge is the result of a leak.
- Overcharging: Too much refrigerant can be as harmful as too little, causing high pressures that can damage the compressor.
- Contamination: Improper tools can introduce moisture and dirt.
- Ineffective Sealers: AC stop-leak products can clog the delicate passages of the expansion valve, orifice tube, and condenser, leading to a complete and costly system failure. Most professional shops refuse to work on systems contaminated with sealant.
- Environmental & Legal Issues: Releasing refrigerant (R-134a or the new R-1234yf) into the atmosphere is illegal in most places due to its environmental impact. Professionals are certified to handle it properly.
When a DIY Recharge Might Be Temporarily Acceptable
If your system is slightly low (e.g., after not being used for years) and you have a set of gauges to monitor pressure, adding a small amount might get you through a season. However, this is a temporary band-aid, not a repair. The leak will continue.
Why Professional Repair is Almost Always the Best Choice
For a confirmed car AC refrigerant leak repair, a professional shop brings certified expertise, proper diagnostic tools, recovery/recharge equipment, and a warranty on both parts and labor. They ensure the repair is done safely, effectively, and in an environmentally responsible manner, protecting your vehicle from further damage.
Cost Breakdown of AC Leak Repairs
The cost of a car AC repair varies wildly based on the leak’s location and the vehicle. Here is a general estimate range for parts and labor:
- Leak Diagnosis & Recharge: $150 – $300
- O-Ring or Schrader Valve Replacement: $200 – $400
- AC Hose or Line Replacement: $300 – $600
- Condenser Replacement: $500 – $1,000+
- Compressor Replacement: $800 – $1,500+
- Evaporator Core Replacement: $1,200 – $2,500+
Factors Influencing Cost:
- Vehicle Make/Model: Luxury and European brands are typically more expensive.
- Type of Refrigerant: The newer R-1234yf is significantly more costly than R-134a.
- Shop Rates: Dealerships charge more than independent specialists.
- Additional Damage: A failed compressor often sends debris throughout the system, requiring a flush and replacement of the condenser and receiver-drier—a “compressor kit.”
Preventative Maintenance for Your Car’s AC System
The best repair is prevention. Extend the life of your AC with these habits:
- Run it Regularly: Run the AC for at least 5-10 minutes once a week, year-round. This circulates the refrigerant and oil, keeping seals lubricated and preventing them from drying out and cracking.
- Get Periodic Professional Servicing: Consider an AC performance check as part of your annual maintenance. A technician can check pressures, look for early signs of leaks, and clean the condenser.
- Keep the Condenser Clean: Periodually rinse debris (bugs, leaves, road salt) from the condenser fins in front of your radiator with gentle water pressure. A clean condenser is critical for efficient cooling.
- Address Problems Early: Don’t ignore weak cooling performance. Early diagnosis of a refrigerant leak can prevent a minor repair from becoming a major one.
FAQ Section: Your Car AC Leak Questions Answered
### What does a car AC refrigerant leak smell like?
You typically cannot smell the refrigerant itself (R-134a has a faint, sweet smell in high concentrations). However, the accompanying oil might have a petroleum smell. The most common odor associated with a leak is a musty, mildew smell from the vents, caused by moisture entering the system and promoting mold growth on the evaporator.
### Can I drive my car with an AC refrigerant leak?
Yes, you can mechanically drive the car. However, running the AC with a significant leak can cause the compressor to run without adequate lubrication and cooling, leading to its catastrophic failure. It’s best to keep the AC turned off until the leak is repaired.
### How long does a car AC repair typically take?
A simple O-ring replacement and recharge can often be done in under 2 hours. A condenser replacement may take 3-5 hours. An evaporator core replacement is a major job that can take a full day or more, depending on the vehicle’s dashboard complexity.
### Are AC leak sealants from auto stores a good idea?
Generally, no. Most professional mechanics strongly advise against them. While they may temporarily seal a tiny leak, they carry a high risk of clogging the entire AC system (especially the expansion valve and condenser), leading to a complete and very expensive system failure. They are considered a last resort for an old car you plan to scrap soon.
### What is the difference between R-134a and R-1234yf refrigerant?
R-134a has been the standard since the 1990s. R-1234yf is the newer, mandated refrigerant for most new cars as of the mid-2010s due to its significantly lower global warming potential (GWP). The systems are not compatible, and you cannot intermix the refrigerants. R-1234yf requires specialized equipment to service and is much more expensive per pound.
Conclusion: Taking Control of Your Car’s Cooling Comfort
A car AC refrigerant leak repair is an inevitable reality of vehicle ownership, but it doesn’t have to be a stressful, financially crippling mystery. By understanding the symptoms—from weak airflow and unusual noises to a disengaged compressor clutch—you can act early. Recognize that while DIY recharge kits offer a tempting quick fix, they often mask the real issue and can lead to more severe damage. A professional diagnosis using electronic detectors or UV dye is the only reliable path to a lasting solution.
Investing in a proper repair, whether it’s a simple O-ring replacement or a more involved component swap, followed by a professional evacuation and recharge, restores not just your comfort but also protects the significant investment in your vehicle’s complex climate control system. Remember, preventative maintenance, like running your AC periodically, is the simplest way to avoid the most common leaks. When the warm air does start blowing, use this guide as your roadmap to a cool, confident, and cost-effective resolution. Your comfort—and your wallet—will thank you.